Hi Everyone,
It’s the first Monday of
the month and everyone knows what that means. The professional designers of the
Designer
Craft Connection
have put together another wonderful blog hop for all of you. Be prepared to
feast your eyes on over 50 fabulous projects from this terrific group of designers.
Our theme for this blog
hop is anything “Spring”. As you hop around each of our blogs, I hope our
projects will inspire you to create some project for this wonderful time of
year. For those of you that are just joining us and you’ve never attended one
of our hops before today, it is sooo easy to do. You just click on the hop
forward on the Designer
Craft Connection
blinkie on the right side of my blog and you’re done! Where else can you find
over 50 different projects all in one area? HERE! That’s where! Have fun and
happy hopping!!!
Thanks for joining me. Until next time…
Crafty hugs,
Lisa
Stampin’ Queen Creations
A Home is a Blessing Photo Display

Ÿ
Create
& Treasure® Ready to Go Blank Board Book™
Ÿ
Midwest
Products® Basswood Piece & Strips
Ÿ
K
& Company® Chipboard Frames & Words
Ÿ
K
& Company® Pattern Paper
Ÿ
Bazzill
Basic Papers® Cardstock- French vanilla, pink, light green, gold, lilac, light
blue
Ÿ
Bazzill
Basic Papers® Just the Edge™ Cardstock Strips- vanilla
Ÿ
Various
Fibers
Ÿ
Gold
Key
Ÿ
Flower
Soft®- sage, spring, fuchsia, nut brown, pale green
tools
Ÿ
Midwest
Products® Easy Cutter Ultimate™
Ÿ
Stamps:
Mason Creation Stamps- House Set, Flower Soft® Quiet Corner Bench Set™, Moments
in Time™
Ÿ
Decorative
Scissors
Ÿ
24
Gauge Wire- green
Ÿ
Inky
Antics® Gamsol Mineral Spirits, Blending Stump
Ÿ
Clearsnap®
Vivid! dye inkpads- Tuscan tan, brown, black
Ÿ
Krylon®
Preserve It! Paper Protectant™
Ÿ
Beacon
Adhesives® Zip Dry Paper Glue™, Flower Soft® White Glue, Foam Tape


scissors,
craft knife
1
Front Cover- Adhere pattern
papers to both sides of blank book. Adhere trim pieces to both edges and down
the center of the inside.
2
Stamp house set with black
inkpad. Color images with color pencils, cut out, and spray with Preserve It!
3
For the door- cut two pieces of
card stock 2 ½”W x 31/2”H. Using the Easy Cutter, cut one piece of basswood 2
¼”W x 31/2”H and one 3/8”W x 3 ½”H. Adhere wood pieces to cardstock, scoring
down 3/8” from the left edge to create the “hinge”. Ink edges with brown
inkpad. Adhere door image to wood piece. Adhere second piece of cardstock to
front of blank board. Next, adhere door on top of cardstock making sure to glue
the door hinge only, leaving door to open and close. Print saying on computer,
cut out with decorative scissors. Ink edges with brown and Tuscan tan inkpads
and adhere to inside of door.
4
For the steps- cut two pieces
of basswood 3”W x 1/8”H and 4”W x 1/8”H. Adhere to back of stairs and then to
blank board cover. Stamp baskets four times with brown inkpad, color, cut out
and adhere to blank board cover with foam tape.
5
Cut wire into 2” strips. Add
Flower Soft glue to wires. Sprinkle Flower Soft over wires and let dry. Shape
flower branches and adhere to inside of baskets. Attach key to chipboard word
with various fibers. Adhere chipboard pieces to blank board cover.
6
Inside Cover- Stamp girl two
times with black inkpad. Color image and cut out. Spray with Preserve It!
Adhere Flower Soft to kitty and flowers with Flower Soft glue. Adhere foam tape
between images and adhere to inside cover.
7
Place pictures in chipboard
frames. Adhere frames and chipboard pieces to inside cover. Use project picture
for placement if needed.
tips: Use Zip Dry Paper Glue for project unless otherwise
noted.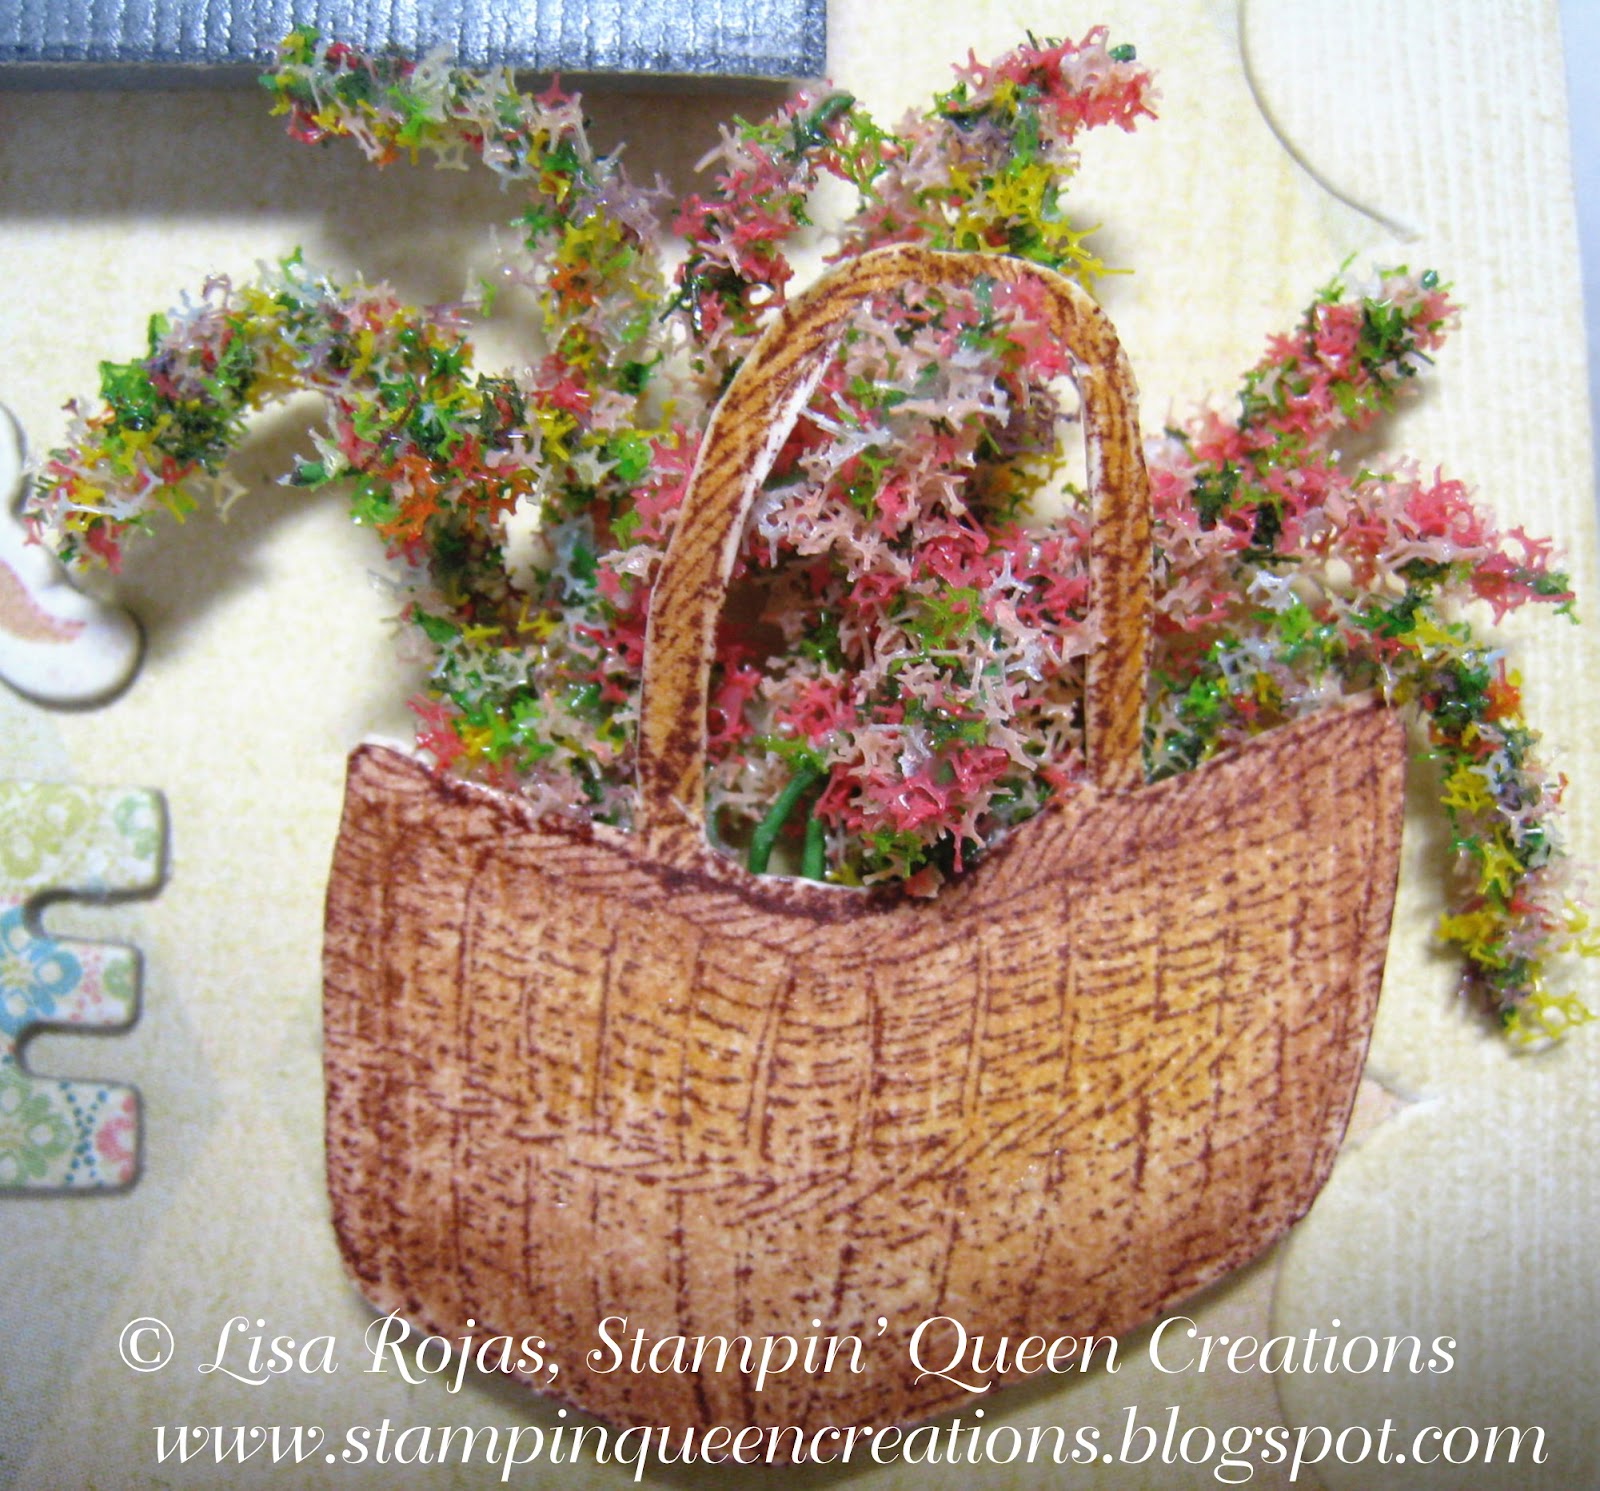
2 comments:
love this idea for a photo display!
This is so pretty Lisa! and what a spring warm welcome!
Post a Comment