Showing posts with label Clearsnap. Show all posts

Thursday, August 13, 2015

A Note for You


Hi Everyone,

I am so happy to be part of this blog hop! My very dear friend and business partner, Ann Butler, is celebrating her birthday!  Ann is not only an extremely talented designer, she also has multiple product lines with Unity Stamp Company, Clearsnap and Earth Safe Finishes.  

Larissa Pittman, who runs Ann's design team, wanted to surprise her with this birthday hop so, she contacted the rest of the design team and a few of Ann's friends to join in on today's blog hop.  The projects that you'll see were created using products from Ann's various product lines.

So, grab your favorite drink, put your feet up, and enjoy the fabulous projects that this talented group of ladies created in celebration of our friend's birthday!!!

Happy Birthday Ann!

Much Love,
Lis

 A Note for You
©Lisa Rojas 2015
Stampin Queen Creations

Materials

Ann Butler Faux Quilting 1" Doily Picnic Stamp Set by Unity Stamp Co.
Ann Butler Faux Quilting 1" Diamonds & Plaid Stamp Set by Unity Stamp Co.
Ann Butler Faux Quilting 1" Leaves All Over Stamp Set by Unity Stamp Co.
Alphabet stamp set
Pattern paper 6" x 6"
Cardboard 6" x 6"
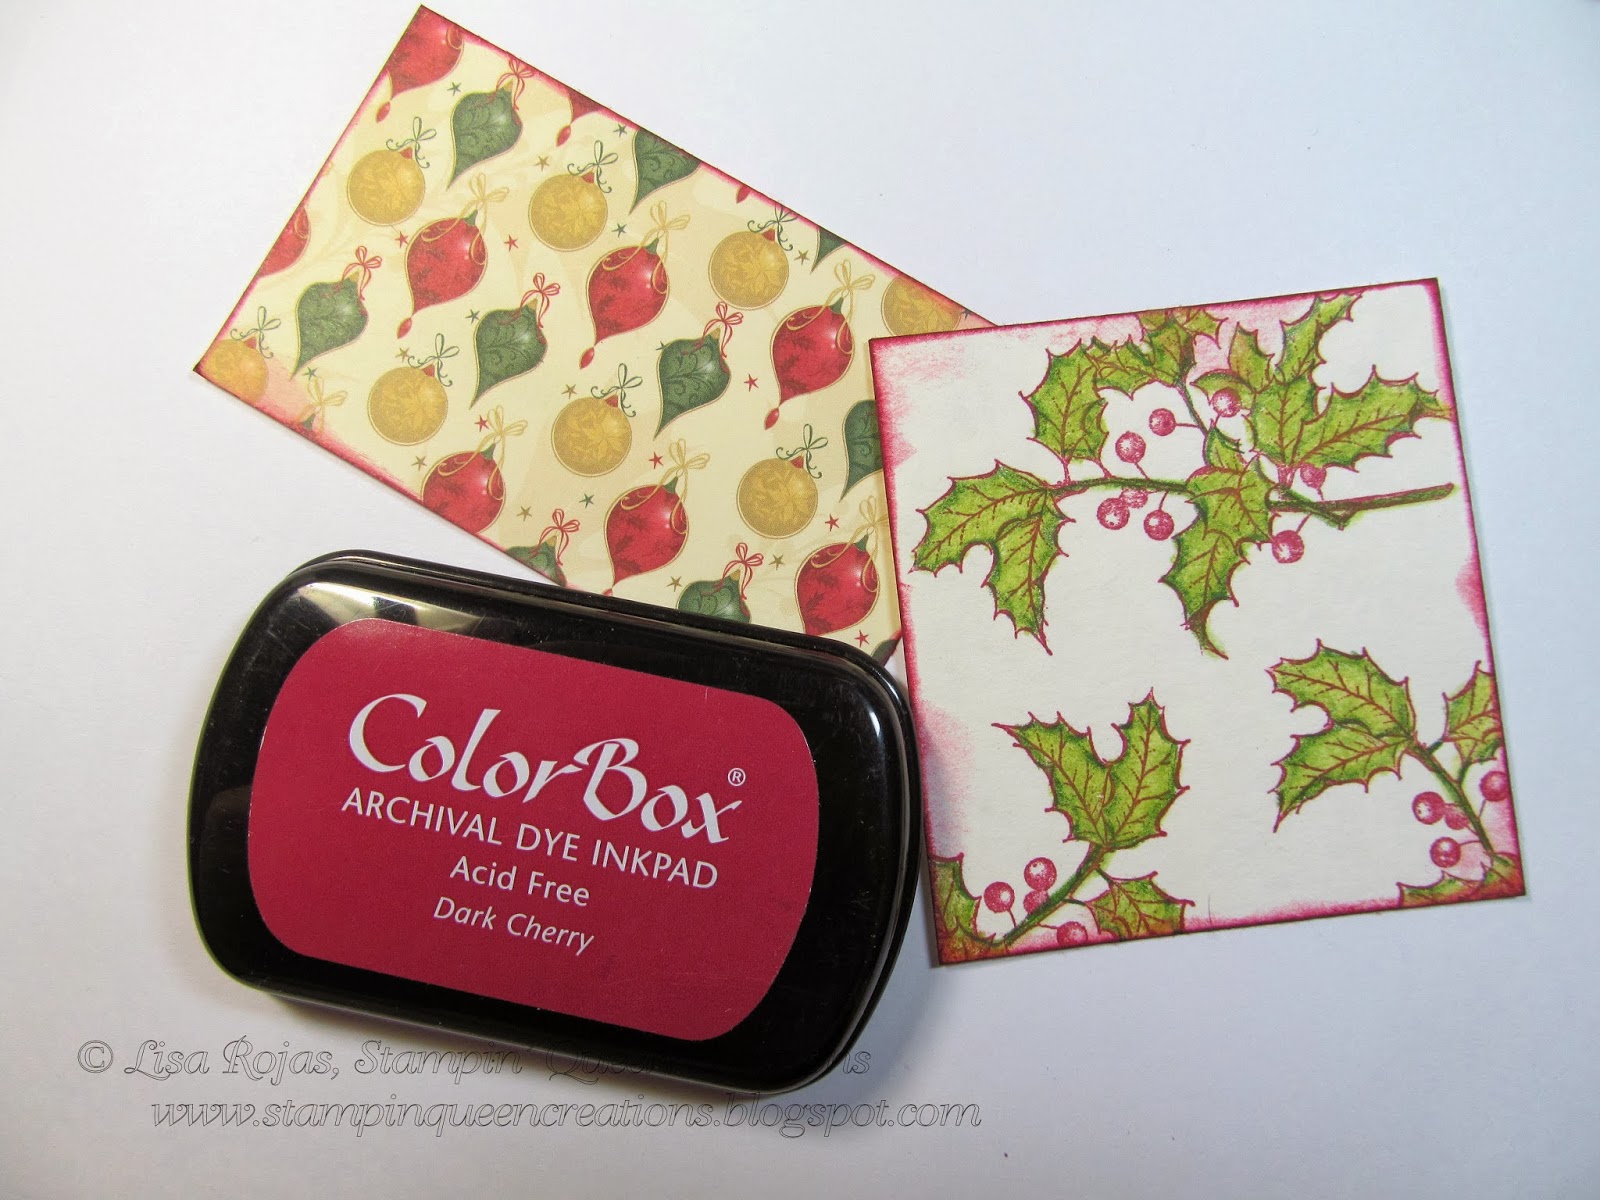
Ann Butler ColorBox Crafter's Inkpads, Sunshine, Aquamarine, Limelight, Tangelo
ColorBox Archival Dye Inkpad, Wicked Black
Beacon Adhesives Zip Dry Paper Glue
Paper flowers, (3)
Various ribbons
Butterfly button (1)
Large clamp paperclip
Scissors
Heat tool
Glue gun
Pad of paper
Instructions

  1. Cut pattern paper and cardboard 6" x 6".  Adhere pattern paper to cardboard with Zip Dry glue.
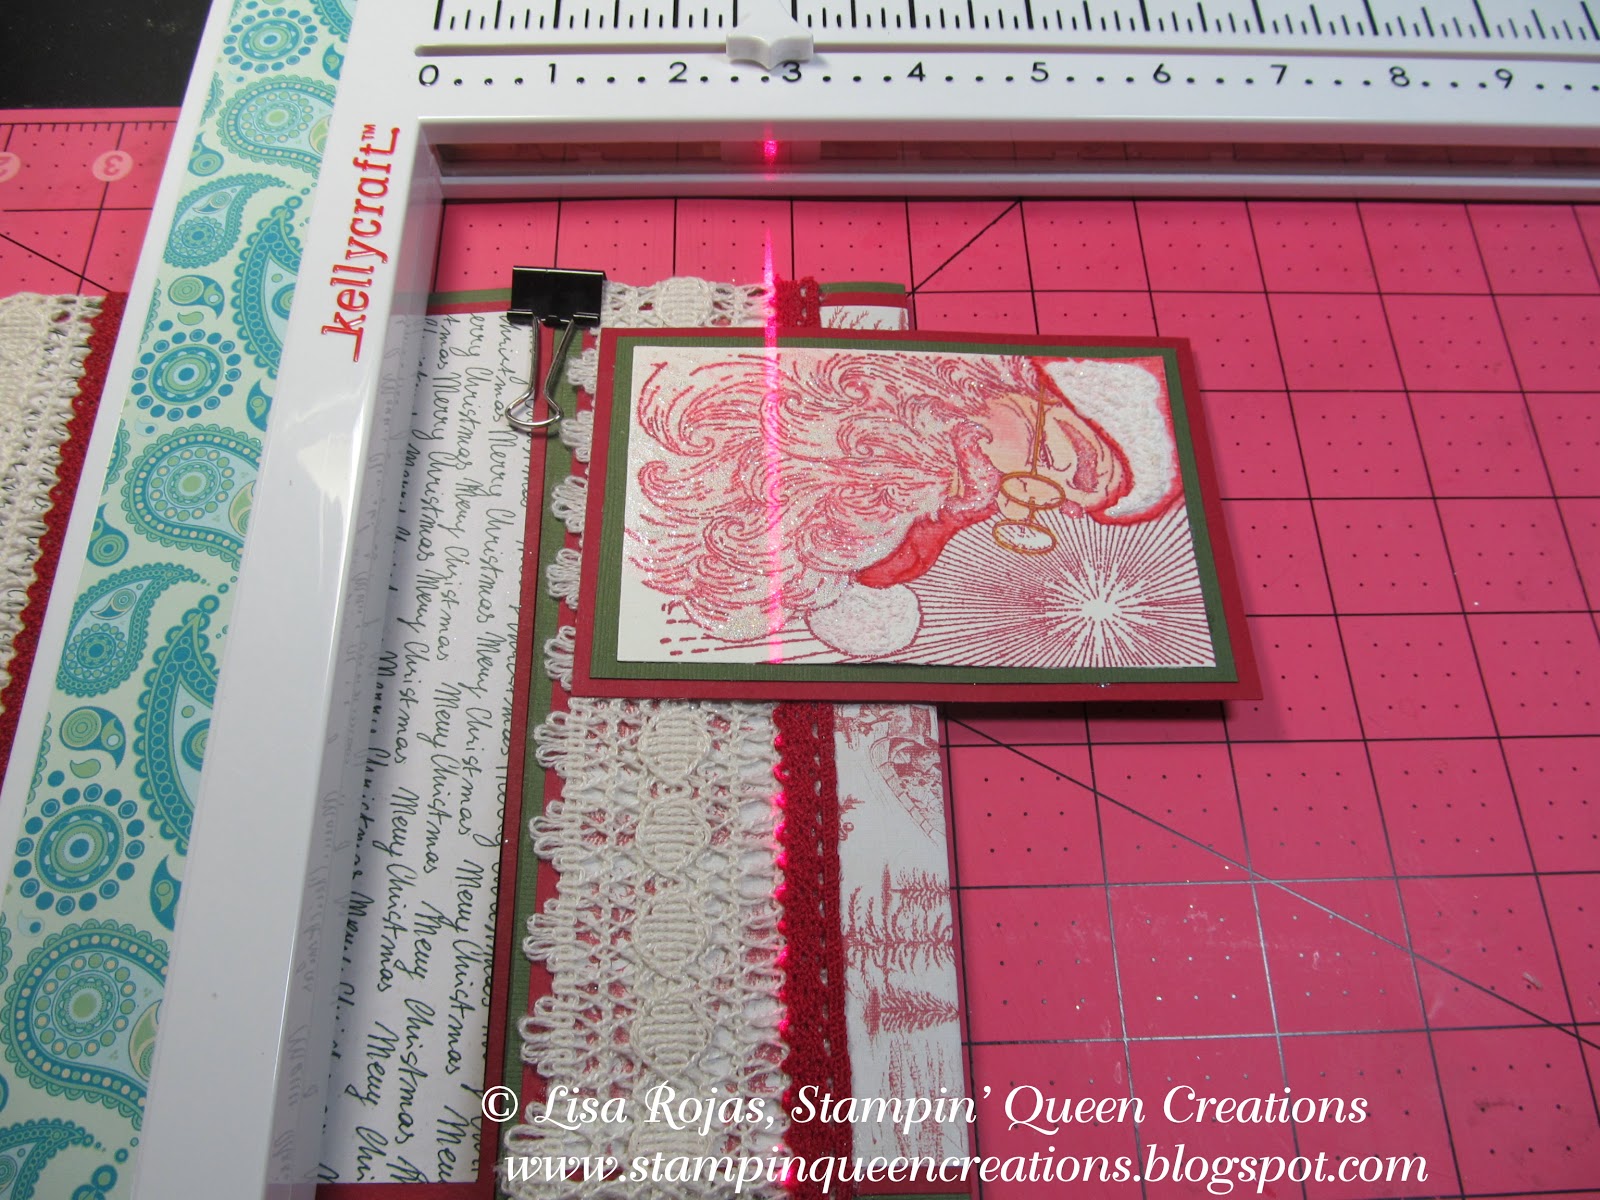
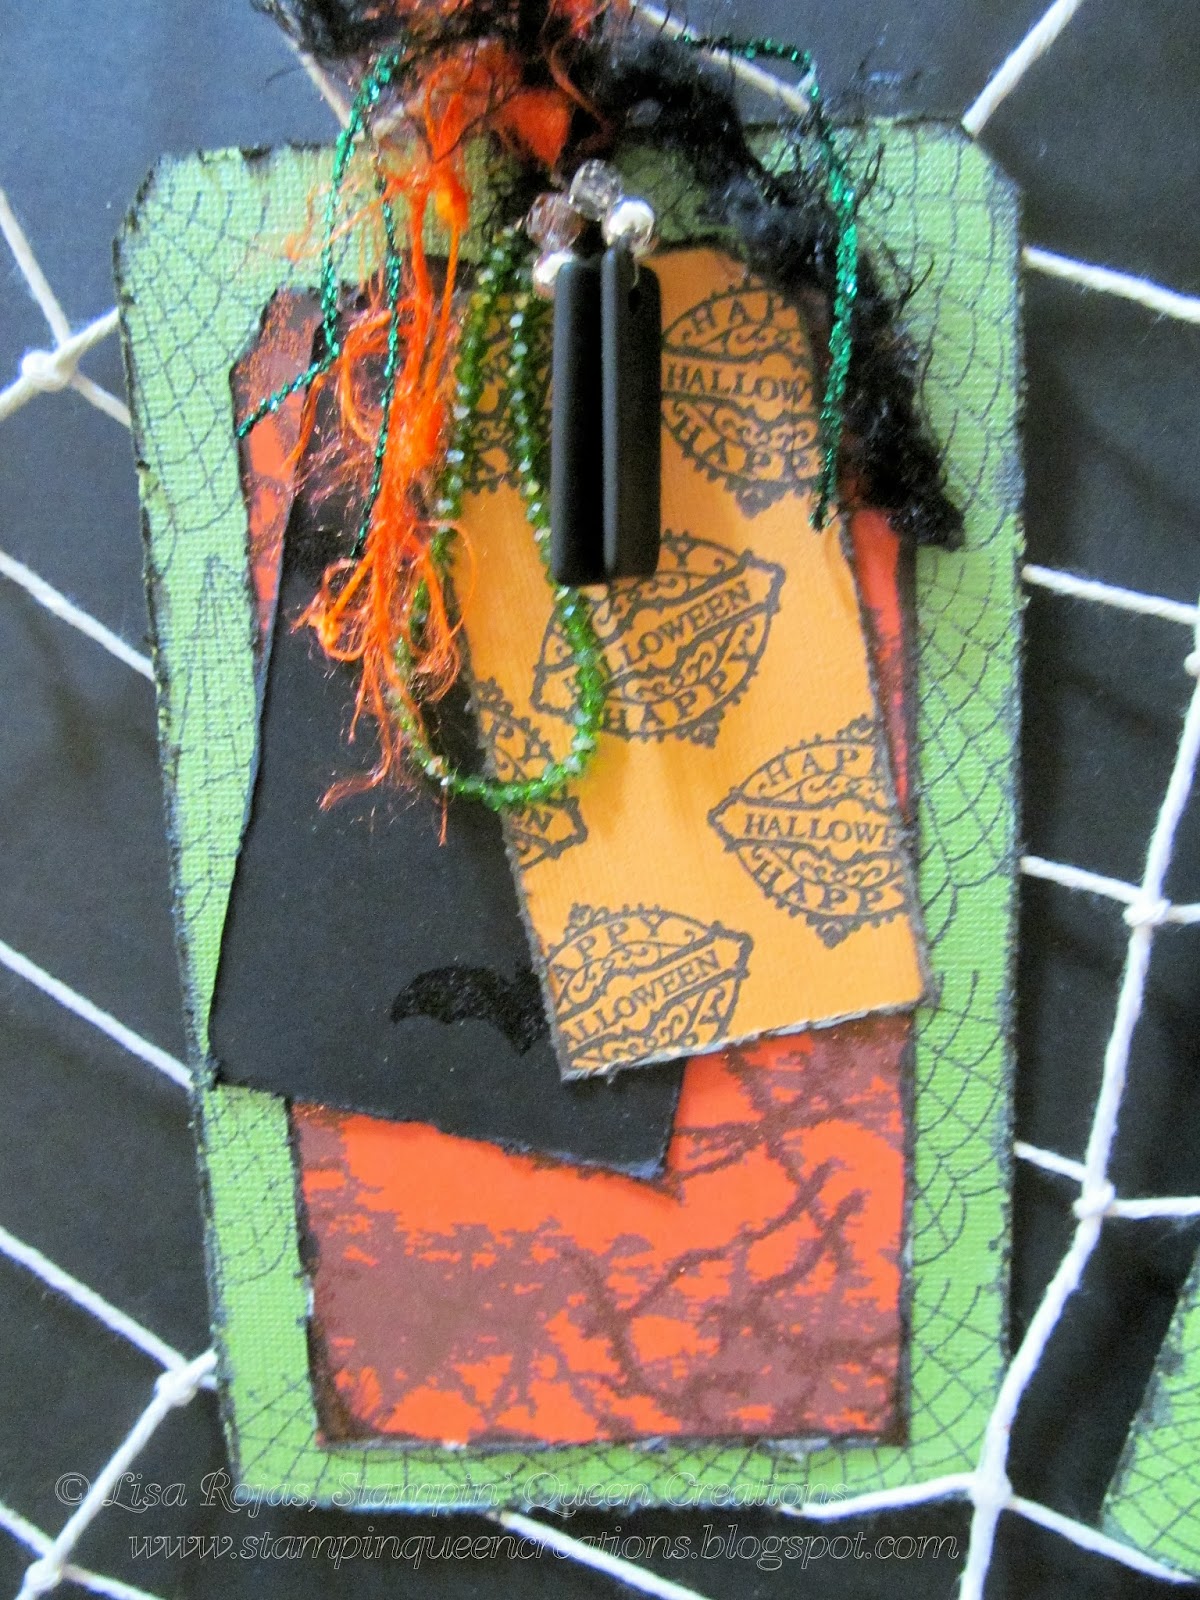
  2. Apply different color inkpads to stamps and stamp images around pattern paper. Use heat tool to dry inks.  Note- See photo for placement if needed
  3. Stamp "Notes" on pattern paper with black inkpad.  Ink edges of pattern paper with Aquamarine.
  4. Cut another piece of pattern paper 2"W x 3"H.  Repeat step 2.  Adhere pattern paper to large clamp.
  5. Tie ribbons around the handle of the large clamp.  Adhere butterfly button with glue gun.  Add flowers to pattern paper with glue gun.
  6. Attach pad of paper to pattern paper with large clamp.


Thursday, December 19, 2013

Ann Butler Designs Blog Hop


Hi Everyone,

I am so excited to be a part of this fabulous blog hop!  My close friend and Designer, Ann Butler, has designed two brand new stamps lines with Unity Stamp Company and KellyCraft Innovations and also a brand new line of inkpads from Clearsnap!

Ann's new line of rubber stamps allows crafters like myself, who love the look of quilting but don't sew.  As you will see with my pillow, it looks like I spent hours and hours quilting the front, when in reality the pillow took me less than an hour for me to create.

Join me along with 11 other professional designers as we bring you some great ideas on how to use these wonderful rubber stamps and inkpads. You won't be disappointed!!!

Thanks for joining me. Until next time...
 
Crafty hugs,
 
Lisa
Stampin' Queen Creations
&
Bella Crafts LLC
 
Faux Quilt Pillow with
Ann Butler Designs
Faux Quilting Rubber Stamps
 
Here is a list of Designers that are participating-
 
Materials:
Flour Sack or Muslin, ½ yard
Pillow insert
Beacon Adhesives™ Fabri-Tac™ Adhesive
Ann Butler ColorBox®Crafter’s™- Lilac, Tangelo, Aquamarine, Sunshine, Limelight Berry
Buttons Galore® Buttons, daisy delight, butterfly
Embroidery thread, White
Ribbon, 1’8”, Purple
Ribbon 1” Sheer- Lavender
Cardboard
Needle 3”
Instructions
1. Fold flour sack or muslin in half and place a piece of cardboard in between.  Stamp pattern out first on a piece of paper.  Stamp out design on the muslin using the paper as a reference.  See photo for the colors and patterns that I used or create your own pattern. Place in dryer for 15 minutes to heat set.
2.  Place pillow insert in between the stamped fabric, pin the front in place leaving the back unattached.  Using white embroidery floss and a 3” long needle, attach buttons to stamped squares through the pillow insert but do not sew them to the back.
3.  Wrap the back of the flour sack or muslin around the back of the pillow insert and glue in place.   Pull the front tight and adhere to pillow.  Fold each side under three times and adhere to pillow insert.  Add ribbon to each corner of the pillow and tie in a bow.  Adhere a bow to the center of the pillow.


Monday, November 25, 2013

Tis the Season Card

Hi Everyone,

The holidays are right around the corner (geez, did I just say that?) and we all need to get ready to create our holiday cards.  I will be sharing two different cards, this one and another for December.  When you're creating cards for the holidays you want them to be simple but pretty!  Of course with the Get-it-Straight Laser Square you'll have the simple part down!  And with your creativity if you choose to design your own, or even if you recreate this one, you'll definitely have the pretty!

Thank you for joining me.  Until next time...
 
Crafty hugs,
 
Lisa
Stampin' Queen Creations
&

'Tis the Season Card
Finished Size- 4 3/4"W x 7"H

Materials

Cardstock- Dark Green, Burgundy & Off-White
Holiday Pattern Paper
Holiday Themed Stickers
Pearl Stickers
Ribbon- Green
Ribbon Thread- Gold
Blending Stump
Holly Rubber Stamp

Instructions

Gather all of your supplies.  Cut papers as follows-
Dark Green- 4 3/4"W x 7"H, Burgundy- 3 3/4"W x 5 1/2"H
Off White- 3 1/4"W x 3 1/2"H and Pattern Paper
4 1/4"W x 2 1/2"H.


Run burgundy cardstock through the
Grand Calibur machine with die cut.

Stamp holly on off white cardstock.  Color with color
pencils.  Blend colors with Gamsol solution and a stump.

Run ribbon through bottom of card.  Attach gold thread ribbon to cardstock with needle.
Ink edges of papers.
Adhere stamped cardstock to
burgundy cardstock with Zip Dry.

to align papers

and adhere papers together with Zip Dry glue.

Align pearls to the top of the card with the
Adhere sticker to the bottom of the card.


Wednesday, November 20, 2013

Merry Christmas Card

Hi Everyone,

With the holidays being right around the corner, I thought I would share a holiday card with you. I started out as a designer creating cards and I love it, especially now that I have the KellyCraft Laser Square in my tool box!

I did not create this card to be an easy mass production card where you can sit down and create 30 of them in one night. This card will take you a little bit longer to create but it's well worth the time you spend making it. This is the type of card that your recipient is going to want to save and cherish for a very long time. This type of card is my very favorite to create and I hope you'll love it too!

Thank you for joining me. Until next time...
 
Crafty hugs,
 
Lisa
Stampin' Queen Creations
&

"Merry Christmas" Card
 
 
Supplies
 
Green, Burgundy & Cream Cardstock
Holiday Themed Pattern Paper
Me & My Big Ideas Holiday Stickers
Cream & Burgundy Trims
Beacon Adhesives Zip Dry Paper Glue
Foam Tape
Gamsol Mineral Spirits
Blending Stump
Clearsnap ColorBox Dye Inkpad- Red Devil
Clearsnap Smooch Top Coat- Moonlight
Marvy Uchida Snow Marker
Stampabilities Vintage Santa
Heat Tool
Scissor

Instructions


Using Red Devil inkpad, stamp santa on white cardstock,
trim with scissors
 
 
Color image with color pencils and blend colors with Gamsol
and blending stump. Apply Smooch to santa's beard. 
 
 
 Add Snow Marker
to hat and use heat tool to set. 
 
Tip: Did you know that you can use your
Get-it-Staight Laser Sqaure to score your cardstock?
 
Cut green cardstock 7"W x 11"H.
Use Get-it-Staight Laser Sqaure score at 5 1/2".
Fold card base at score line.
 
 
Cut cardstock- For card front cut burgundy cardstock
6 3/4"W x 5 1/4"H. Pattern paper 6 1/2"W x 5"H
For inside card cut burgundy cardstock 6 3/4"W x 5 1/4"H
Pattern paper 6 1/2"W x 5"H. For Santa cut burgundy
cardstock 3 1/4"W x 4 3/4"H. Green carstock
3"W x 4 1/2"H
 
 
Use Get-it-Straight Laser Square to layer all cardstock pieces
 
 
Fold card front in half


Cut burgundy cardstock 4 1/2"W x 3 1/2"H and green
cardstock 4 1/4"W x 3 1/4"H.
Use  Get-it-Straight Laser Square  to line up stickers


Adhere cardstock and pattern paper to inside of card
with Beacon Adhesives Zip Dry Paper Glue.
Use Get-it-Straight Laser Square to line up trims.
Adhere to inside card base.
 
 
Repeat last step to card front. Adhere santa image to
front of card.
 
 
Finsih card by applying the remainder of the
stickers with glue. For "Merry Christmas" piece,
adhere foam tape to back to give it some height.
 Use picture if needed for placement.


Wednesday, October 30, 2013

Autumn's All Around

Hi Everyone,

I completed this project for the KellyCraft Blog and I thought I would share it here with you!

I am back with another great project using the KellyCraft Get-it-Straight Laser Square. I know that I have said it before, but really, I love this product! This tool is what I call my all-in-one! I have been stamping for many years and I can't tell you how many times my project is almost finished and I stamp that last image only to have it not stamp completely on my paper. How frustrating! Well, with my Get-it-Straight Laser Square not only can I line my page elements up perfectly, I can also use it to re-stamp my incomplete images. I am so in love!

This project is a fairly simple to create and sunflowers for me, always remind me of Autumn. With the stamped sunflower and a few embellishments, you have a wonderful project that you can hang on the wall or sit it on your table. And for a beautiful table centerpiece, place your frame on a table next to a vase filled with sunflowers. Now that would be very, very pretty.

Thank you for joining me. Until next time...
 
Crafty hugs,
 
Lisa
Stampin' Queen Creations
&
Bella Crafts Quarterly
 
Give The Queen A Call!!!


Supplies

8" Square Canvas
Pattern Paper
Cardstock- Tan, Rust, Brown & Yellow
Lace & Trim
Straw Ribbon
Brown Ribbon
Acetate Words
Glue Gun
Micro Beads
Dove Blender Pen
Foam Tape

Instructions
Using the Get-it-Straight Laser Square line the pattern paper
and adhere it to the canvas


Stamp the sunflower on tan cardstock three times
and the butterfly twice.


Color the stamped images with Faber-Castell chalk pencils
and blend the colors with a blender pen


Add Zip Dry Paper Glue to the center of the top sunflower
and cover with micro beads. Pour excess beads back
into the container


Using a Cricut Personal Cutting Machine with the Fancy Frames
cartridge, cut out three frames with yellow, brown & rust
cardstock. Adhere the frames together. Add foam tape to the
back of the frames


Cut out all three sunflowers. Add foam tape between each
sunflower and adhere to the frames. Cut out both butterflies
and adhere them together at the butterfly's bodies, leaving
the wings free


Using the Get-it-Straight Laser Square, line up all of
your elements and adhere to the canvas.


After you have added all of your elements, adhere trim
around outer edge of the canvas with a glue gun.
Add brown bow and you're done!


Monday, October 28, 2013

Creepy Halloween Card

Hi Everyone,

Halloween is one of my favorite holidays! I love all the decorations, food, and all of those little ghouls & goblins ringing the doorbell and screaming "Trick or Treat!" Since my kids are grown now I don't get to take them around the neighborhood with their treat bags, but with my first grandbaby due in December, I'm sure going to take her next year!!!

As I was thinking about my project for this post I was thinking about making a treat bag for my soon- to-be grandbaby but since I can't take her out until next year, I decided to make this fabulous grown up Halloween card. My Get-it-Straight Laser Square made this card a breeze to make. I loved be able to put ribbon on my card and have it straight. I have never been able to do that before!

So, let's get started and I will show you once again why you really need this great tool in your studios!!!

Thank you for joining me. Until next time...
 
Crafty hugs,
 
Lisa
Stampin' Queen Creations
&


Supplies
Black Cardstock- 10"x10"
White Cardstock- Scraps
Green Glitter Paper- 2 3/4"H x 1 1/2"W,  3 1/4"H x 1 1/2"W, 3 3/4"H x 1 3/4"W & 6 1/2"H x 2"W
Pink Paislee Pattern Paper- 6"x6"
Pink Paislee Clear Stamp Set- Phantom                                                                       
Recollections Adhesive Rhinestones- Black
Recollections Glitter on a Roll Stickers
Recollections Glitter Ribbon
K & Company Halloween Stickers
Clearsnap Top Boss Watermark Inkpad
Black Tinsel Embossing Powder
Beacon Adhesives Zip Dry Paper Glue
Westcott Personal Paper Trimmer
Westcott 4"Titanium Scissors
Heat Tool

Instructions:

Gather your supplies


Fold black cardstock in half. Using Zip Dry Paper Glue adhere pattern paper to base card. 
 Line up ribbon on card with the Get-it-Straight Laser Square; and adhere to card.


Stamp images on white cardstock, emboss with black tinsel powder and heat set.
Cut images out and adhere them to the green glitter cardstock.

Layer stamped images on card base using the Get-it-Straight Laser Square.
Adhere the Fleur stickers along top and bottom on card.


Next, add black rhinestones and stickers. 


 That's it. You're done!!!
Created Easily with the Get-it-Straight Laser Square.

Friday, October 25, 2013

Halloween Tags with Connie Crystal

Hi Everyone,

For this project I will be highlighting two companies, Connie Crystal and Robin's Nest.  I wanted to show you that the beautiful bling from Connie Crystal can be used for more than just jewelry projects.

With Halloween right around the corner, I decided that I wanted to design some tags with these great Halloween themed pattern papers from Robin's Nest. They are easy to create and with Connie Crystal's bling added to them, they're just fabulous!!!

Thank you for joining me. Until next time...
 
Crafty hugs,
 
Lisa
Stampin' Queen Creations
&
 
Bella Crafts LLC
 

Halloween Tags
 
Materials
 
Cardboard- Green & Orange
Various Fibers
Fishing Line
Tim Holtz Paper Distresser
 
Instructions
Gather all f your supplies.  The tag sizes are as follows:
4 1/4"W x 7"H, 3 1/4"W x 6"H, 2 1/2"W x 4 1/4"H and
2"W x 3 3/4"H.  Cut 2 large tags from green cardstock,
cut 2 medium tags from pattern paper, cut 2 small tags
from black pattern paper and 2 extra small tags from
orange cardstock.
Stamp green tags and orange tags with wicked black
inkpad.
Ink edges of all tags and distress tags with tool.

Adhere all tags together with Zip Dry.
Add sea beads and micro beads to fishing line.  Attach
all the beads and fibers to each tag.