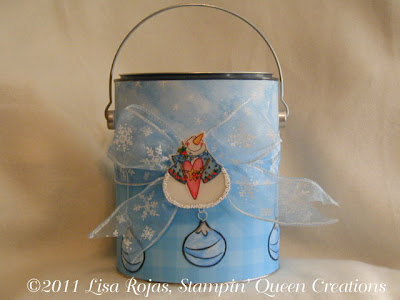
It's the first Monday of the month and that means it's time for another round of blog hopping with the professional designers of the Designer Craft Connection! Our theme for this blog hop is handmade holidays and I'll be sharing a fun way to wrap your gifts that also can be used as a holiday decoration! To hop from blog to blog, click on the DCC blinkie on the right side of my blog.
I am also very happy and excited to share with you some fabulous news!!! The new issue of Bella Crafts Quarterly, Winter Journey, is now available to you as a FREE download. This new issue is full of spectacular holiday crafts, along with terrific business articles for anyone looking to turn their handmade crafts into a business, and great tips & tricks on all things craft related! It's a full 32 pages with wonderfully photographed projects and easy to read instructions! And if that is not enough...we are also offering a Cricut Mini as our giveaway for this issue.
I just know that you are going to love, love ,love this new issue so be sure to check it out for yourself on our website- www.bellacraftsquarterly.com. While you're at the website, look around at the new features we have added and sign up for our mailing list so you'll never miss any of our fabulous issues!
Thank you for joining me. Until next time...
Crafty hugs,
Lisa
Stampin' Queen Creations
&
Bella Crafts Quarterly
Give The Queen A Call!!!
Paint can- gallon size
Pattern paper- two different types
Ribbon- 2” wide
Basswood- 3/32” wide
White card stock
Vivid! dye based inkpad-Black
Watercolor pencils
Wire- 24 gauge Silver &
White
Shake-On Beads
Paper, Rock, Scissors glitter paint
Aleene’s Paper Glaze
Aleene’s Memory Glue
Aleene’s Platinum Bond Glass and Bead Slick Surfaces Adhesive
White acrylic paint
Wire cutters
Scissors
Exacto knife
Paintbrush
Pin back
Hole punch
Rubber Stamps:
Snowman with Heart
Hanging Ornament
Instructions
1. Cover entire paint can with two different
pattern papers. Stamp snowman once and ornament
six times on white card
stock with black inkpad. Color images with watercolor pencils. Cut
out images.
2. With silver wire, make six small loops. Adhere
to the back of ornaments. Cut white wire and
shape into six ornament
hangers. Attach to ornament loops.
3. For the pin, stamp snowman on white card stock
with black inkpad. Color with watercolor
pencils. Cut out. Lay image
on wood. Trace with a pencil. Cut wood with exacto knife. Paint
wood with white paint. Let
dry. Adhere stamped image to wood.
4. Apply a thin layer of Paper Glaze over stamped
image. Let dry for 24 hours. When dry,
adhere green glitter paint
to holly leaves. Add red and white beads with Glass & Bead
adhesive. See picture for
placement if needed. Adhere pin to back of wood image.
5. Tie ribbon around paint can. Adhere ornaments
to paint can. Attach snowman pin to
center of the bow.


No comments:
Post a Comment