Hi Everyone,
The day is
finally here! The Designer Craft Connection professional designers have been
very busy creating wonderful designs with the fabulous products from ImpressArt
Metal Stamps and embellishments.
I must admit that this was the very first time I
used these metal stamps and I was a little nervous that they would be hard to
use. My first thought was I was going to break one of my fingers, or worse than
that, I would break a new manicured nail! Oh my gosh, we cannot have that! But
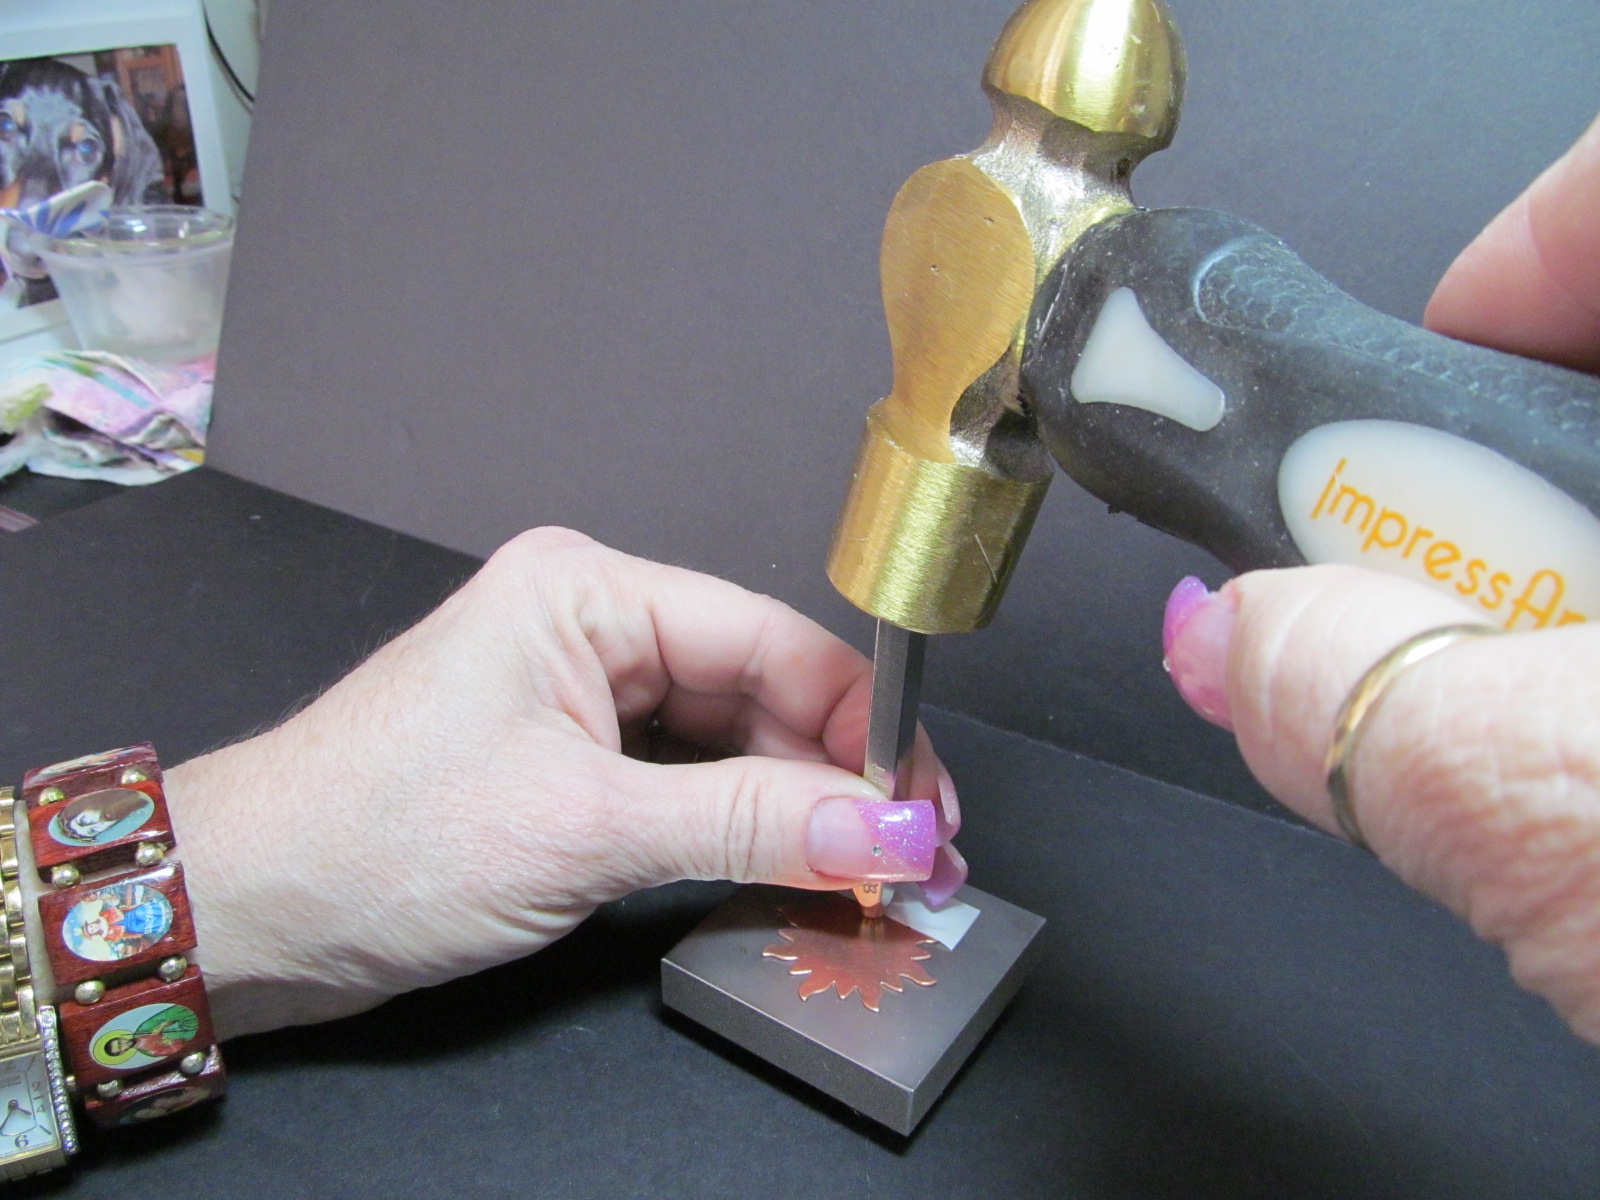
I realized that after I practiced a few times and I made sure that I taped the
metal embellishment down to the metal pounding block, these little metal stamps
were very easy to use.
Well, that was all it took to have me hooked! I
began pounding these little metal stamps on everything. I finally had to stop
because the constant pounding was scaring my little wiener dog so badly that I
was sure she was going to have a doggie heart attack!!!
So with scared wiener dogs aside, if you’re looking
for great ideas using these terrific metal stamps, you have come to the right
place. All you need to do is clink on the Designer Craft Connection blinkie on
the right side of my blog to begin hopping from one blog to the next. And for
more information on the ImpressArt Metal Stamps and embellishments, please
visit their blog at www.impressart.com.
I hope you have a wonderful time hopping from blog to blog. I know I will!!!
Thank you for joining me. Until next
time…
Crafty hugs,
Lisa
Stampin’ Queen Creations
Give The Queen A Call!!!
Contest*Contest*Contest*
ImpressArt Metal Stamps will be hosting a very cool contest. For more details on the contest, check back with me on Monday and I'll have all the terrific details!

Contest*Contest*Contest*
“Let it Shine” Key Ring
 |
| Materials for Project |
Materials
ImpressArt Alphabet Stamp Set, Jeanie, (lowercase)
ImpressArt Design Stamp, Whimsy Flower
ImpressArt Metal Stamping Blanks, Sun & Star
ImpressArt Metal Stamping Hammer
ImpressArt Metal Stamping Block
ImpressArt Metal Stamping Block
ImpressArt Stamp Straight Tape
Mat board
Pattern paper
Tan cardstock
Jewels
Micro Beads
Key ring
Fibers
ColorBox Pigment Inkpads- Gold, Copper& Moss
Green by Clearsnap
Clearsnap Clear Embossing Powder
Smooch Pearlized Accent Ink- Pumpkin by Clearsnap
Heat tool
Hole punch
Super Tape
Zip Dry Paper Glue by Beacon Adhesives
Dazzle Tac Jewelry Glue by Beacon Adhesives
Marker
Sun & Star Rubber Stamps
Instructions
1. Cut mat
board into the shape of a tag. Adhere pattern paper to the front and back of
tag. Cut tan cardstock into tag shape smaller then mat board. Stamp sun &
stars randomly on cardstock with pigment inkpads, cover with embossing powder
and heat.


2. Adhere
cardstock to tag. Color center of the sun with Smooch. Adhere Super Tape around
edges of tag and cover with micro beads.
Set aside.
3. Place
metal sun embellishment onto the Steel Stamping Block. Tape into place with Stamp Straight Tape. Using Metal Stamping Hammer, stamp “let it shine” on the sun. Repeat with
metal star embellishment using small flower stamp. Scribble impressions with a
marker. Wipe off excess marker ink.




4. Punch hole
in tag. Tie fibers through the tag and key ring. Using Dazzle Tac, adhere
jewels to metal embellishments and three jewels to bottom of tag. Tie metal
embellishments to key ring.
 |
|
©Lisa Rojas, Stampin’ Queen Creations
|

