Friday, August 31, 2012

Guest Blogger- Debra Quartermain!!!


Hi Everyone,

It's Guest Blogger Day here at Stampin' Queen Creations! What does that mean you ask? Well, it means that every Friday I will take off my crown and pass it on to a fabulous professional designer who's work I respect more that words can say. Today I pass my crown to my friend, professional CHA Designer, Debra Quartermain!!!

I have known Debra for a number of years and she is fabulous designer with a heart of pure gold! I have never really acquired the ability to sew, and when I meet someone that has that ability I am always amazed. And what Debra can achieve with a sewing machine is not only amazing...her work is absolutely stunning!

Here is the official scoop! Debra Quartermain, CEO! Creative Eternal Optimist shares her enthusiasm for creativity through books, magazines, print ads, project sheets and manufacturer product development. Teaching, consulting or demonstrating her goal is to always inspire and motivate everyone's creative spirit! Her main areas of expertise are creating whimsical characters, fashion & home decor accessories. Her designs and articles have appeared in hundreds of magazines, Creative Homearts, Crafts n' Things, Creative & Decorate, Country Sampler, Quilting Treasures, Bead Unique. For more information on Debra, please check out her website at-


Debra, thank you so much for allowing me to showcase your beautiful work on my blog. I am in awe of your talent and so happy to call you my friend! It is my pleasure to pass my crown on to you today!!!

Thank you for joining me. Until next time...
 
Crafty Hugs,
 
Lisa
Stampin' Queen Creations
 
Give The Queen A Call!!!


Wednesday, August 29, 2012

Wordless Wednesday- Cupcake Box by Glimpses by Signify Pink!

Wordless Wednesday's are the days that I post just a project without instructions or a supply list.
 
 
Hi Everyone,
 
My Wordless Wednesdays project today is so totally cool and easy that you don't need instructions from me!
 
I know, you think I have lost my mind but I'm really telling you the truth. This cute cupcake box comes pre-cut with the instructions to put it together from the very talented people at Glimpses by Signify Pink. This project is so easy you can put it together in 15 minutes! How cute would a bunch of these boxes look on a table for a bridal shower, baby shower, birthday party, etc. You get the idea!  Hummm...I have a baby shower to plan pretty soon. You know I'll be contacting this company for more boxes!!! Too cute!!!
 
For more information on these fabulous boxes, please visit their website at-

Thank you for joining me. Until next time...
 
Crafty Hugs,
 
Lisa
Stampin' Queen Creations
 
Give The Queen A Call!!!


Monday, August 27, 2012

Be Inspired Wood Album

Hi Everyone,

For today's post I thought I would share a wood album that I made about a year ago. Like any of the project that I share on my blog, if the stamps are no longer available, you can always replace them with stamps that are on the market now.

This project is very easy to create and a great way to add wood in your project if you're afraid to stamp directly on the wood. When I first began stamping many years ago, I loved making projects with wood products but I was always a little afraid about stamping right on my wood piece. What if I mess it up? How would I ever begin to fix it? Well, I can say that I no longer feel that way and I have learned many ways to fix problems when stamping on wood simply through trail and error.

Thank you for joining me. Until next time...
 
Crafty hugs,
 
Lisa
Stampin' Queen Creations
 
Give The Queen A Call!!!


Be Inspired Wood Journal
SUPPLIES
Walnut HollowÒ wood journal
Mulberry paper- Natural
FrescoÔ Chalk-Finish inkpads- Venetian Sunrise, Golden Parchment, Olive Grove, Medici Marble,
and Amaretto Truffle
Stamp-A-Memory Ô inkpads by All Night MediaÒ- Soft Rose and Sand
Brilliance pigment inkpad by TSUKINEKOÒ- Graphite Black
Clear embossing powder
KrylonÒ Preserve It! Spray Sealer
KrylonÒ Spray Adhesive
Crafter’s PickÔ The Ultimate! Glue
ColorboxÔ Foam Tip Applicators
Copper sheet
Magic MeshÔ- Tan
Heat tool
Assorted fibers and beads
Rubber Stamps:
Create & Inspire by Stampa Rosa
Goddess of Art by Stamps Etcetera
Paintbrushes by Art Impressions
Letters & Time by Stampington & Co.
Woman’s Face by Limited Edition
Goddess Key by Acey Deucy
Italian Poetry Background by Hero Arts
 
INSTRUCTIONS 
Step 1. Remove screws from journal. Apply spray adhesive to wood journal and cover with mulberry paper. Using Direct to Paper technique, apply inks to front, back and sides of journal. Put journal back together.
Step 2. Stamp images randomly to the front of the album using the chalk-finish inkpads. Spray front and back of journal with sealer. Stamp two images on the copper sheet with black pigment inkpad. Emboss with clear powder and melt with heat tool.
Step 3. Cut metal images out with scissors. Cut two pieces of Magic Mesh slightly larger than the metal pieces. Lay Magic Mesh on journal and adhere metal pieces with The Ultimate! glue. Wrap assorted fibers around the end of the journal and add beads.


Friday, August 24, 2012

Guest Blogger- Dawn Lotharius

Hi Everyone,

It's Friday and at Stampin' Queen Creations that means I have the opportunity to share with you all another fabulous Guest Blogger. It is my pleasure to introduce to you my new friend, Dawn Lotharius!

Dawn is a CHA Designer and I met her for the first time at the CHA show held in Chicago this past July. Dawn is one of the sweetest person I have met and her talent is amazing! One of the things I find most endearing about Dawn is that she likes to call everyone "sweetie"! That says a lot about her personality. Everyone is "sweetie" to her and I love that!

And as I said, her work is amazing! She is an avid crafter and was a EK Success instructor at Michael's Craft Store. She loves teaching workshops in her home and various other places. Dawn enjoys stamping, scrapbooking and coloring with alcohol markers, but most of all loves working with new products.

For more in formation on Dawn's work, please visit her website at
http://www.dawnscraft.com/2012/08/can-i-buy-vowel.html  And Dawn is having a fabulous giveaway on her blog right now, so you don't want to miss that!

Dawn, thank you so much for allowing me to showcase your beautiful work! I'm so glad we met and I hope that our friendship will grow in the future. You are just a "Sweetie!"

Thank you for joining me. Until next time...
 
Crafty hugs,
 
Lisa
Stampin' Queen Creations
 
 
Give The Queen A Call!!!


Copyright Dawn Lotharuis 2012
 

Wednesday, August 22, 2012

Looking Into The Past

Hi Everyone,

Instead of doing a Wordless Wednesday post, I decided to change things up and do a "Looking Into The Past" post. This project was published in the September/October 202 issue of The Rubber Stamper magazine and even though the stamps are no longer available and you can find stamps all over the place with a beach type theme that will work perfectly! The technique is still easy to do today, so no worries there. Since the instructions might be a little hard to read, I have reprinted them for you. Give the technique a try. It's very simple to do but you can get stunning results!

Thank you for joining me. Until next time...

Crafty hugs,

Lisa
Stampin' Queen Creations

Give The Queen A Call!!!


Candles by the Sea
By
Lisa Rojas
Stampin’ Queen Creations

Materials Checklist 
Pillar candles- 6”
White Mulberry paper
Corrugated paper
Faber-Castell Chalk Pencils
Memories Dye-Based Inkpad- Black
Xyron Machine with Adhesive cartridge
Aleene’s Ultimate Glue Gun
Lou Davis Matte Sealer
Decorative scissors
Straw ribbon or ribbon of choice
Raffia
Jute string
Sea shells
Rubber Stamps:
Sea Gulls by Personal Stamp Exchange
Sailboat by C. I. Stamping

Instructions 
Step 1.   Cut mulberry paper into two squares approximately  4”h x 3”w. Stamp sea gulls and sailboat on mulberry paper using black inkpad. Color images in with chalk pencils. Run images through the Xyron machine, and spray with sealer. Cut images out, leaving a border around the images. Carefully remove the  paper backing and adhere images to candles. 
Step 2.   Cut corrugated paper to fit around the candles. Trim with decorative scissors and glue to the bottom of the candles with glue gun. Add straw ribbon, raffia, jute string and sea shells with glue gun.


Tuesday, August 21, 2012

Westcott Designer Showcase

Hi Everyone!

I am so very pleased to announce that Westcott Brand, "Home to the World's Favorite Scissors!" has just crowned me as their "Top Designer". I am the newest member of their very elite group of the craft industry's top designers in their "Designer Showcase".

This is such a huge honor for me and I'm very excited to be a part of this fabulous group of designers. These ladies are part of the best designers in our industry and to be recognized as one of them makes my heart so happy!!!

And very, very humble. For me, it means that I have to reach even farther into myself to bring out and create the very best designs that I can possibly create not just for the public, but for myself also. It's a tall order but I have faith I can do it!!!

For more information on my newest accomplishment please visit Westcott Brands website at http://craftingrocks.com/page/designer-showcase-lisa-rojas.

Westcott Brand will continue to be THIS designer's favorite scissors! Many thanks to Westcott Brand and Marisa Pawelko for this wonderful honor. I will wear my crown proudly!!!

Thank you for joining me. Until next time...

Crafty hugs,

Lisa
Stampin' Queen Creations

Give The Queen A Call!!!


Monday, August 20, 2012

Meet My Grandbaby!!!

Hi Everyone!

I am so very excited to introduce to all of you my very first grandbaby, Zoey Mychael Brown!!!  Although my wonderful grandbaby is still growing inside of my beautiful daughter's tummy, I could not wait another minute to introduce her to the world!

This photo is a 4D sonogram picture of baby Zoey that was taken back in June and if you look closely you can see her sucking on her thumb! She is so much bigger now and at her last sonogram she was over 1 pound! Can you tell how excited I am about this wonderful blessing?


These are pictures of my gorgeous daughter, Richelle Elisabeth, a few months ago and even though her tummy was a good size then (only about 4 months along), with Zoey growing so quickly, so is she!!! But even as her tummy grows with Zoey she continues to be a beautiful pregnant mommy and I'm so very proud of her! We will welcome baby Zoey to our family the beginning December of this year. I can't wait for my beautiful baby girl to hold HER beautiful baby girl in her arms for that very first time. One of the many things that I think are so awesome about the pregnancy is that my daughter found out she was pregnant with her first child the same week that I found out I was pregnant with her 30 years ago. How totally cool is that? The very same week!


And of course what kind of designer would I be if I didn't share a small project that goes along with this blessed event. All I did  to create this project was take a picture of Baby Zoey's first sonogram, adhered it to some cardstock and added some stickers. Quick and easy to make but a wonderful keepsake for my daughter and her family.


Thank you for joining me. Until next time...

Crafty hugs,

Lisa
Stampin' Queen Creations

Give The Queen A Call!!!


Friday, August 17, 2012

Guest Blogger- Jennifer Priest!!!

Hi Everyone!

Well it's Friday, and here at Stampin' Queen Creations that means it's Guest Blogger Day! Today it is my total privilege to have Jennifer Priest from Hydrangea Hippo as my Guest Blogger!!!

I met Jennifer about a year and a half ago at the CHA show in Anaheim. I have to say that she is one of the most talented people on this planet! And this woman never stops! The funny thing is, we only live about 10 minutes away from each other and because we're both so busy and she's like the energizer bunny (she never slows down!) we have never gotten together at home. We only see each other at the shows!

The project of Jennifer's that I'm sharing today is just a small sample of her outstanding work! For more of Jennifer's beautiful work, please stop by her website at www.hydrangeahippo.com

To Jennifer- Thank you so much for allowing me to showcase your fabulous talent on my blog. You truly are an amazing artist and  I tip my crown off to you. I'm proud to call you my friend!!!

Thank you for joining me. Until next time...

Crafty hugs,

Lisa
Stampin' Queen Creations


Wednesday, August 15, 2012

Wordless Wednesday- Very Simple Dog Ornaments!

Wordless Wednesday's are the days that I post just a project without instructions or a supply list.


Hi Everyone,

For today's Wordless Wednesday I have decided to share a project that I did a few years ago. They are small wood ornaments that were painted and stamped. Very simple to do, but very cute to give as gifts! Try some of you very own!!!

Thank you for joining me. Until next time...

Crafty hugs,

Lisa
Stampin' Queen Creations

Give The Queen A Call!!!


Monday, August 13, 2012

Traveling with Baby


Hi Everyone, 

With summer just about to be over I thought I would share at least one more project before it fades away for another year. And this project is great for a few reasons! It’s a recycle project and another way to scrapbook out of the album!!! 

How many times have you left on a business trip with mixed feelings? On one hand, you’re excited to get some business done and see people that maybe you only get to see once or twice a year and on the other hand, you don’t want to leave your family behind because you’re going to miss them so much? If you answered yes to either one or both of these questions, this project is for you! How could you possibly miss your family when you have them decorated right on your luggage! 

So, before traveling on that next business trip or just a trip without your family, hit your closest Salvation Army store and pick yourself up a beat up piece of luggage. Then go home, gather your pictures together and with some decoupage glue, start creating your very own “priceless piece of luggage”. Then wherever you go your family will always be with you. What could be better than that! Have fun!!! 

Thank you for joining me. Until next time… 

Crafty hugs, 

Lisa
Stampin Queen Creations


Give The Queen A Call!!! 

Traveling with Baby


Supplies 

Old suitcase
Photos
Aleene’s Instant Decoupage Glue-Matte Finish by Duncan
Cricut Personal Cutting System by Provo Craft
Cricut Cartridge-Alphalicious by Provo Craft
Dot pattern paper
Word pattern paper
Blue & Green cardstock
Animal Print material
Off White trim
Off White fleece
Glue gun
Large Foam Brush 


Instructions

Step 1.  Using large foam brush, spread decoupage glue over entire front side of suitcase, cover with dotted paper. Cut squares from animal printed material with pinking shears and decoupage randomly over suitcase front. 

Step 2.  With pinking shears, cut words from pattern paper and adhere to suitcase with decoupage glue. Using Cricut machine and Alphalicious cartridge, cut out the words “The Many Faces of” with green and blue cardstock. 

Step 3.  Arrange photos and words on the front of the suitcase. Adhere to suitcase with decoupage glue. When completely dry, repeat entire process on the back of the suitcase if desired. 

Step 4.  Cut 8” strips of material. Tie to handle. Adhere trim around suitcase with glue gun. 

Step 5.  For the inside- Adhere printed material and fleece to inside of the suitcase with glue gun. Adhere trim with glue gun also. Make Yo Yo’s and leaves from material. Cut four squares of material with pinking shears. Add Yo Yo’s and squares to inside of suitcase with glue gun. Use picture for placement if needed.


Friday, August 10, 2012

Clearsnap Classes at CHA Show


Hi Everyone, 

I know that today is supposed to be Guest Blogger day, but since I’ve been writing about the CHA show all week, I thought I would go ahead and finish up the week with another post on the show. I promise that next Friday I will bring you another fabulous guest blogger, so stay tuned for that. 

While I was at the CHA Summer Show in Chicago a few weeks ago I taught three really cool classes at the Clearsnap booth. My love for Clearsnap’s products are no secret; they have the BEST ink products on the market, so when I get a chance to teach for them, I get so excited and I am so there! 

This is a very cute floral card that you can create in under an hour. It’s a little hard to see in the picture, but the flowers just pop out with some 3D foam tape and a little bit of Flower Soft. I hope that you get a chance to make this card for someone special in your life. If you do, send me the pictures. I’d love to see what you create! 

Thank you for joining me. Until next time… 

Crafty hugs,

Lisa
Stampin’ Queen Creations 

Give The Queen A Call!!!


Happy Day Floral Card


Supplies

Clearsnap ColorBox Pigment Inkpads Moss Green, Sky Blue & Black
Clearsnap Top Boss Watermark Inkpad
Clearsnap Clear Embossing Powder
Clearsnap Smooch Pearlized Accent Ink- Pumpkin, Pool, Green Apple & Taffy
Clearsnap ColorBox Stylist Handle
Clearsnap ColorBox Stylist System Components- Circle Shape
Acrylic Blocks
Stampendous Clear Stamps- Daisy Thanks set
Bazzill Basic Cardstock- Blue Belle, Pollen, Guacamole & Avalanche
Flower Soft- Spring
Beacon Adhesives Zip Dry Paper Glue
Therm-o-Web ½” Foam Squares
Westcott Personal Paper Cutter
Westcott Titanium 5” Scissors
Paintbrush and small amount of water
Ruler
Bone Folder
Heat Tool

Instructions

Step 1.   Cut Blue Belle cardstock 4 ¼”W x 11”H, fold in half. This is your base. Cut another piece of Blue Belle cardstock 4 ¼”W x 5 ½”H. Score ½” and fold on the shorter side, creating a 4 ¼”W x 5”H with a ½” folded flap.  

Step 2.   Apply glue to the folded flap and adhere it to the bottom of the inside back panel of card base. Cut Pollen cardstock 4”W x 5 1/4”H.  Cut two pieces of Avalanche 3 ¾”W x 5”H. Stamp flowers with black inkpad on both pieces. One will be your base image and the other will be your “3D” image. On the 3D piece, emboss with clear powder. Using a paintbrush, color image with Smooch inks, cut out. 

Step 3.  On base image, stamp “happy day” with black inkpad and emboss. Sponge edges with stylist tool and Sky Blue inkpad. Apply foam squares to back of 3D image and adhere to base image. Stamp butterfly three times on scrap piece of Avalanche with black inkpad. Emboss with clear powder, color with Smooch inks and cut out. Adhere to base image. See picture for placement. Adhere Flower Soft to flower center with glue. Adhere base image with Pollen cardstock, and then adhere to card front. 

Step 4.  For the base of the card, cut Pollen cardstock 4”W x 4 ¾”H. Cut Guacamole cardstock 3 ¾”W x 4 ¼”H. Stamp swirl image randomly with Watermark inkpad. Stamp butterfly with Moss Green inkpad. Adhere Pollen cardstock to card base and Guacamole cardstock to Pollen. 

Step 5.  Cut Blue Belle cardstock 3 ¼”W x 1 ¾”H. Cut Avalanche cardstock 3”W x 1 ½”H. On Avalanche stamp “thanks a bunch” and ladybug with black inkpad and emboss. Use stylist to add Sky Blue ink to edges. Adhere to Blue Belle cardstock. Apply foam squares to back and adhere to the card base.

Wednesday, August 8, 2012

Best New Product at CHA Summer Show


Hi Everyone, 

As I mentioned in an earlier post, I just returned from the Craft and Hobby show that was held in Rosemont, IL. Each time I attend one of the CHA shows I always come home and write a post or two on the show and the great new products that I saw while I was there. 

Well, this time it’s going to be a little different. Although I was super busy working this show, I did have a little time to walk the show in search of fabulous new products and I must say that even though I found some cool new stuff the only product that I’m going to blog about is Kelly Craft Innovations Get-it-Straight Laser Square.


This new product is going to change the way scrapbookers and card makers alike, change the way they work on their projects! The product is so fabulous and I love it so much that nothing else that I saw at the show even comes close to this new tool, and that is the reason I only want to post about one product. For me, this is the product that every crafter is going to want to have in their studios and work spaces!!! 

The Get-it-Straight Laser Square takes all the guessing out of layering your pages and projects. With the laser built right into the tool, you can see exactly where you want your items to be placed. No more guessing or eyeballing your page elements, it lines everything up exactly to where they need to be. 

I was so excited about this tool, that I bought it right there at the show! I even tried talking the guys into letting me take their demo product home with me because I didn’t want to wait for mine to arrive after the show. Heck, if they would had let me take it with me, I would have been playing with it on the plane ride home!!!


I am so excited about this new tool that I’ll let you in on a little secret. After every CHA show that I attend I come home and make a list of the new products that I saw and I pick one that I think is going to be a HUGE success. I have been playing this game with myself for about five years now and every single product that I have picked in the past has turned out to be one of the “It” products that everyone just has to have! Can you guess which new product I picked after this show? You guessed it! The Kelly Craft Innovations Get-it-Straight Laser Square! I can’t wait for mine to be delivered and after you visit their website and see what I saw…you’ll be just as excited as I am!!! 

For more information about this fabulous new product, please check out their website at www.kellycraftinnovations.com. You’ll be happy that you did!! 

Thank you for joining me. Until next time… 

Crafty hugs, 

Lisa
Stampin’ Queen Creations 

Give The Queen A Call!!!

Monday, August 6, 2012

Designer Craft Connection- Crafting with School Supplies


Hi Everyone! 

Guess what today is! If you’ve been following my blog for any time, you know that today is the first Monday of the month and that means the professional designers at Designer Craft Connection are blog hopping! Our theme for this month’s hop is “Crafting with School Supplies”.  With summer coming to an end and kids everywhere heading back to school, what better time to start your school crafting! 

We have anywhere from 30 to 50 professional designers that participate in this blog hop each month so, we have a never ending supply of inspiration for you. Each designer that participates has the Designer Craft Connection blinkie on their blog somewhere. To get started, click on my blinkie that you will find on the right side of my blog, then “hop” from one blog to another. Hours of fabulous inspiration is awaiting you with a click of your computer mouse. Enjoy and have fun!!! 

Thank you for joining me. Until next time…

Crafty hugs,

Lisa
Stampin’ Queen Creations 

Give The Queen A Call!!!


Teacher Gift Basket Set 

My whole entire life has been spent around educators. First, growing up with my dad the teacher, principal, and assistant superintendent and then marrying my husband, the teacher. So, naturally I grew up with a strong appreciation of teachers. As a child, I remember my mom creating hand crafted gifts to give to all of my teachers to show her appreciation (probably thankful for tolerating me!). When I had my own children, I carried on the tradition. By making hand crafted gifts like this basket set, I believe you’re letting these wonderful men and women know how truly special they are. This basket set is a quick and easy way to let that special teacher in your child’s life know how much you care for all of their hard work and kindness.  Go ahead, make a teacher smile.

 SUPPLIES FOR BASKET 

Basket
Foam core board
School themed pattern paper
Ruler frame
Blue card stock
White card stock
Various buttons
Blue, yellow & green gingham ribbon
Blue braided trim
Zip DryÔ Paper Glue by Beacon AdhesivesÒ
Watercolor pencils by Faber-CastellÒ
ColorBox® Archival Dye inkpad Wicked Black by Clearsnap®
Paintbrush
Preserve It!Ô Paper Protectant by Krylon ProductsÒ
Rubber Stamps-
Alphabet stamp set by Unknown
School border by Provo CraftÒ 


INSTRUCTIONS FOR BASKET 

Step 1.   Measure and cut foam board to fit top of basket. Adhere blue card stock to bottom of foam board. Cut yellow ribbon 4”. Fold in half to make a loop. Adhere to top center of foam board. Cut three pieces of green ribbon 2”. Adhere ½ of ribbon to top of foam board in the back 3” apart. Leave other half of ribbon free. These will be your hinges. 

Step 2.  Adhere school themed paper to top of foam board. Adhere blue trim around foam board, again leaving green ribbons free. Cut white card stock 4” x 6”. Stamp words and school border with black inkpad. Color with watercolors pencils. Spray all stamped images with Preserve It! Paper Protectant. 

Step 3. Adhere white card stock to ruler frame. Adhere frame to top of foam board. Lay foam board on top of basket. Adhere green ribbons to the back of basket for your hinges. Adhere three red buttons to green ribbons. 

Step 4.  Make bows with blue ribbon. Attach to each side of handles. Adhere buttons to ruler frame. Adhere red heart button to front center of basket. Loop yellow ribbon around heart button to close lid.

SUPPLIES FOR NOTEPAD 

5” X 7” Blank book by Hot Off The PressÒ
School themed pattern paper
Yellow pattern paper
White card stock
Assorted fibers
Assorted colored brads- ¼” & 1/8”- four of each size
ColorBox® Archival Dye inkpad Wicked Black by Clearsnap®
ColorBox® Pigment inkpad Green by Clearsnap®
Clear embossing powder by Clearsnap®
Zip DryÔ Paper Glue by Beacon AdhesivesÒ
Watercolor pencils by Faber-CastellÒ
Paintbrush
Preserve It!Ô by Krylon ProductsÒ
Heat tool
Rubber Stamps-
School border by Provo CraftÒ
Time To Enjoy by Hero ArtsÒ 

INSTRUCTIONS FOR NOTEPAD 

Step 1.  Adhere school themed paper to front and back notebook covers. Cut yellow pattern paper 3” x 5”. Cut white card stock 2” x 4” for wording and 1 ½” x 3 ¼” for tag.

Step 2.  Stamp wording with green pigment inkpad. Ink edges. Emboss with clear powder. Stamp school border with black inkpad. Ink edges. Color image with watercolor pencils. 

Step 3.  Attach wording and yellow pattern paper to notebook front with brads. Attach fibers and tag. 


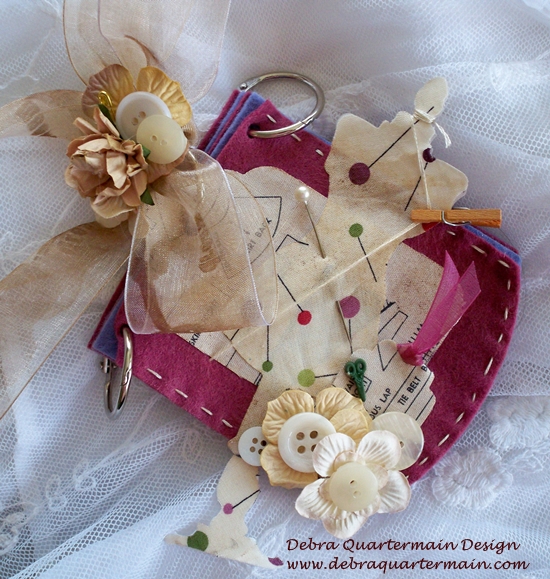
SUPPLIES FOR KEYCHAIN 

Foam core board
Mat board
School themed pattern paper
White card stock
ColorBox® Archival Dye inkpad Wicked Black by Clearsnap®
ColorBox® Pigment inkpad Sky Blue by Clearsnap®
Clear embossing powder by Clearsnap®
Zip DryÔ Paper Glue by Beacon AdhesivesÒ
Watercolor pencils by Faber-CastellÒ
Paintbrush
Preserve It!Ô by Krylon ProductsÒ
Assorted fibers
Blue ribbon
Heat tool
Key ring
¼” Hole punch
Rubber Stamps-
Alphabet set by Unknown
School border by Provo CraftÒ 

INSTRUCTIONS FOR KEYCHAIN  

Step 1.  Cut foam board into tag shape 2 ½” x 4”. Adhere school themed paper to front and back of tag. Adhere ribbon around edges. Cut mat board into tag shape 1 ½” x 3 ¼”.

Step 2.  Stamp word and school border with black inkpad. Color with watercolor pencils. Ink edges. Punch holes into both tags. Attach key ring and fibers to both tags.

Step 3.  Stamp Post It notes with black inkpad. Tie ribbons around glue gun and large chalks for an added touch.